20 things I learned about browsers and the web. Part 1

Open these both in new tabs. Right click on the link (open in new tab)

If you want to do it the hard way first read through the first half of the book pages 1 through 19 and then fill out the online form.   But if you want to do it the easy way, read and fill it out as you go.

This assignment is to be done individually which means NO SHARING ANSWERS (cheating) if you are caught sharing an answer or having an answer shared to you, there will be NO FREE TIME for both students typing practice instead.    I gave you hints as to which page each answer is on, and if you still need help, raise your hand and I will come help you.

http://www.20thingsilearned.com
 For best practice - zoom into the full page view in the bottom right

Alchemy

Alchemy is a form of chemistry and speculative philosophy practiced in the Middle Ages and the renaissance and concerned principally with discovering methods for transmuting baser metals into gold and with finding a universal solvent and an elixir of life.

Alchemy is also any magical power or process of transmuting a common substance, usually of little value, into a substance of great value.

Practice your own chemistry here making at least 20 different substances.

http://alchemy.l8r.pl/

Auto Tune

Watch this video: http://www.youtube.com/watch?v=64iv40rqDf4&safety_mode=true&persist_safety_mode=1

Read this articlehttp://entertainment.howstuffworks.com/auto-tune.htm


Do it yourself: http://slothtoss.com/projects/flash_auto-tuner/


Talking doesn't sound as good to auto-tune, consider trying to sing so that the notes get stretched out.


Once you have tried the live auto tune for several minutes to figure out how it works.


Back to the main menu, Record a few minutes of yourself auto-tuned and then save it as a MP3 to your Y drive.

Yearbook Sparkle

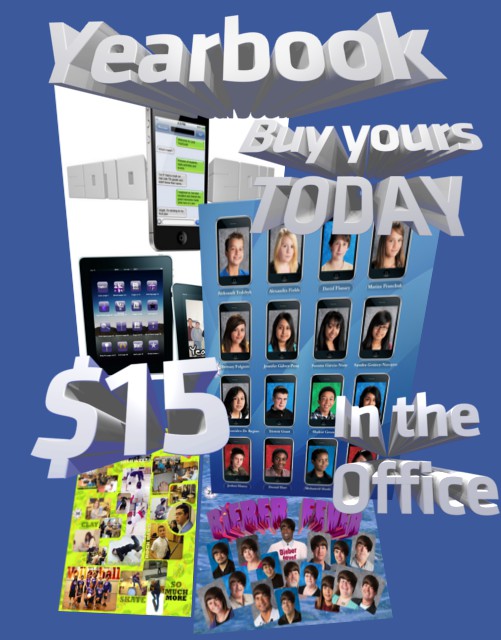
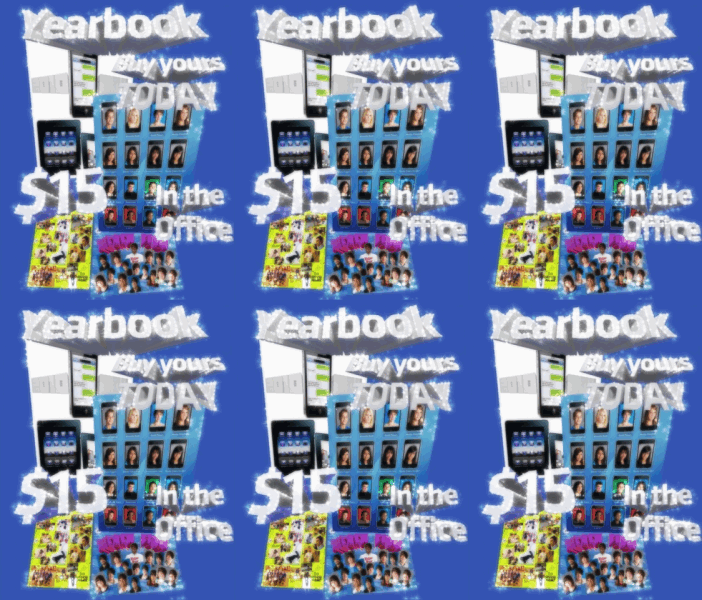
Make a Yearbook Advertisement and then make it sparkle.

Day ONE: using GIMP put together a collage of yearbook words and images.

Yearbook words and images located in shared folder, sub folder titled yearbook.

Use the GIMP tools:
Scale,
Move,
Rotate,
Perspective - to stretch the angles like I did, you have the freedom to create it however you like.

Put at least 3-4 yearbook pages or parts of the pages into your advertisement.


Day TWO: put together the glittering / sparkling effects using this website.

http://glitterboo.com/photo-effects.php

Save finished project as animated gif and then copy the animated gif to the shared folder yearbook folder > finished.

Tilt Shift Photography

You will learn how to make a post-processing tilt shift photograph which basically means a picture of a real thing that "looks" like it's a miniature model.

Goals of this assignment:


-Have a tilt shift image of a place of residence (your house, your uncle freds house, your grandpas house, apartment, condo etc, keep it personal not some random celebrity).
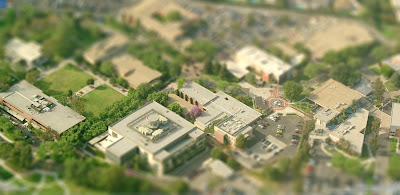
-Have a tilt shift image of a school (grade school, middle school, high school, college, your favorite one even if you havn't yet attended).
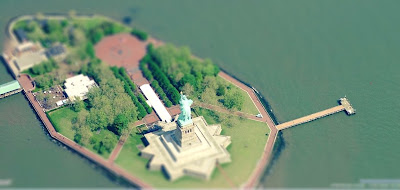
-Have a tilt shift image of a place of interest / attraction (amusement park, favorite hotel / park / mall, famous building, etc).
-Images captured from bing.com/maps -  birds eye view.
-Images must be captured using acquire screen shot and cropped in GIMP.
-Tilt shift images made at tiltshiftmaker.com.
- Should take 1 - 2 days.
-fill out the GRADE

The assignment is to learn how to make a miniature model scene of familar places which is called tilt shift photography. The basic principal is that by blurring the the viewer's gaze may be directed to parts of the image the photographer wishes to emphasize. And this direction causes the lifesized objects appear to be miniature in the photograph.
For the full article please see:
http://en.wikipedia.org/wiki/Tilt-shift_miniature_faking


EXAMPLES - This is my neighborhood guess which is my house, also, where I went to college at Biola University, and the Statue of Liberty.


Do all three steps, three times to complete this assignment.

STEP 1: Find the picture.

First go to bing.com/maps then search for the location of interest, start with your house so put your full address don't forget the city and state. Then click on the button "birds eye", on the top you have navigation to zoom out and in and to rotate from four different angles, find one that looks best to you.

Remember you need 3 different locations: 1 house, 1 educational facility, 1 popular attraction / place of interest.

Ideas for Schools:
Stata Center
Arcadia university
Union college
Grady Gammage Memorial Auditorium
Encinal High School Alameda, CA
Success Tech Cleveland OH
Ernest R Ellott Elementary
Franklin high school Portland
Cleveland high school Portland
Madison high school Portland
Benson high school Portland
Jefferson high school Portland

Ideas for popular attractions:

Pittock Mansion
Oaks Park
World Forestry Center
OMSI
Oregon State Capitol
Disneyland
Pioneer Courthouse Square
Disneyworld
Eiffle Tower, France
Colossem Rome
RMS Queen Mary
Sydney Opera House
Las Vegas
Lisbon, Portugal
Basilica di San Pietro, Vatica
Statue of Liberty
Acropolis, Athens, Greece
Reichstag, Germany
Alcatraz
Washington Monument
Times Square
Pearl Harbor
Trafalgar Square, England
Niagara Falls
Hollywood Sign
Universal studios, Universal city, CA
Sea World, San Diego
Basilique du Sacre-Coeur de Montmartre, Paris
Pleasure Beach, UK
Busch Gardens Tampa Bay, Florida
Grauman’s Chinese Theater
The London Eye, UK
Navy Pier
Temple Square
Waikiki Beach
Myrtle beach
Oregon Zoo
Mount Rushmore
Bosque de la Alhambra, Granada, Spain
Gravensteen
Guimaraes Castle

STEP 2: Capturing the image (say cheese).


1. Launch the application GIMP.
2. Go to the Bing Birds Eye View and then in GIMP click File > acquire > screen shot
3. In GIMP, use the Crop tool to keep only the image part of the screen, not all the extra browser buttons and stuff.
4. Save the image as a filename.jpg

STEP 3: Make it at tiltshiftmaker.com
Follow the directions provided on the website.
Remember to "get full size" and then "click here to download" and save the file to your Y drive.

THE GRADE

REMEMBER
SAVE YOUR WORK OFTEN, CROP THE IMAGES TO THE BIGGEST SIZE YOU CAN WHILE NOT SHOWING WEBSITE STUFF, WHEN YOU NEED HELP ASK(raise your hand) but FIRST re-read the assignment guidelines.

Student Work:

National Wildflower Week Research & Presentation


http://www.paulnoll.com/Oregon/Wildflower/index.html - STEP 1, find a wildflower of interest. DAY 1

STEP 2. RESEARCH, find out all there is to know about that wildflower. google wikipedia, etc. DAY 2

Presentation Step 3, put your information into a presentation.
Find your slide, put the information into the slide, (slides sorted alphabetically).  DAY 2


Presentation must have:
  • Scientific and normal flower name.
  • Several INTERESTING facts, NOT BORING ONES.
  • Photograph of the wildflower
  • Link to local Oregon hike
  • Your Name
  • Decorations to help make the presentation pretty.


Research and find a hike that you think looks interesting that you could potentially see wildflowers on.


http://www.portlandhikersfieldguide.org/wiki/Category:Wildflower_Hikes  DAY 3


http://www.oregon.com/hiking


Day 4 - Decorate, finish up, make sure it's all completed and looks good with all the requirements met.


If you wanted animated pictures (moving) like I have decorated with, search for animated gif flower.


If you wanted still pictures like several of the ones I use, that do not have a square shape search for whatever you are looking for and PNG as the file type.


Feel free to create your own decorations using Inkscape and Export Bitmap (png).

Mothers Day Bouquet

Vector Flowers, text on a path, 3D text of mothers name. Using Inkscape and Blender

*If you don't have a mother figure that you would like to give this to, consider making it for a teacher that you know is a mother, that would make their day.

Day 1 & 2: Vector flowers, make enough for a full bouquet (at least 7, but more the better)
Be creative with color choices, shapes of petals, sizes etc.


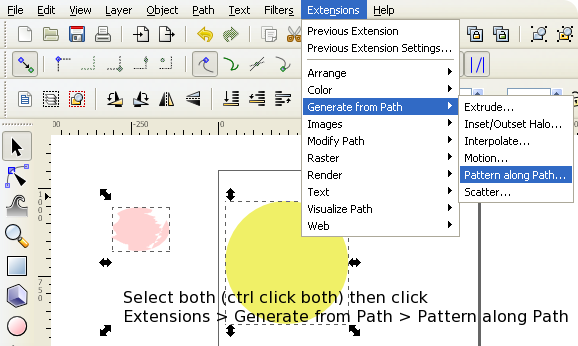
Sorry new version has different word, click Effects instead of Extensions


Day 3. Creating 3D text and then inserting it into the bouquet. Follow the 3D font freak assignment to learn how to do 3D text again if you need directions, 
Be sure to choose a font and color that fits with your mother or the recipient of your bouquet.

Insert the rendered png image into Inkscape by File>Import.
use layers up and down buttons to arrange it into the bouquet.

Day 4. Text on a path, putting it all together, exporting and printing.

Once you are completed with your design and have all the requirements are met, you will need to export it as a bitmap.
Export as bitmap
Step 1: In Inkscape click File > Export Bitmap
Step 2: Click for export area "page" for Bitmap size "90 dpi" (the width and height will follow) for filename "Browse and designate where you want the file and what you want it to be named. Then click Export.